
Vivado has the ability to create and manage your own IP, which is a good thing. But there are some real gotchas when doing something like this, the first being that it doesn’t seem to place HDL files in the correct locations.
I have been running some FPGA workshops using the IP Packager in Vivado and having been having a lot of problems when creating new files in the IP component. Here’s an example:
From a Vivado project select Tools→Create and Package IP… Click Next, select Create a new AXI4 peripheral, click Next, just use the defaults for the next page, click Next again, use the defaults for the AXI information and click Next again, select Edit IP, then click Finish.
This will put in an IP Packager project. Edit the top level file myip_v1_0. I’m using Verilog but it works the same for VHDL. Instantiate a new dummy module at the bottom of the file:
// Add user logic here
dummy dummy (.clk(s00_axi_aclk));
// User logic ends
 Save the file and look at the design sources. You will see that there is now a new undefined module in the design called dummy. It should look like the figure to the right:
Now, we would like to create the new module. So we go to File→Add Sources… and create the new source file. Select Add or create design sources and click Next. Click Create File …, type the file name dummy and click OK. Click Finish. When the Define Module dialog pops up, just click OK. Click Yes to the dialog saying you haven’t changed anything. You now have a file defined for your dummy module.
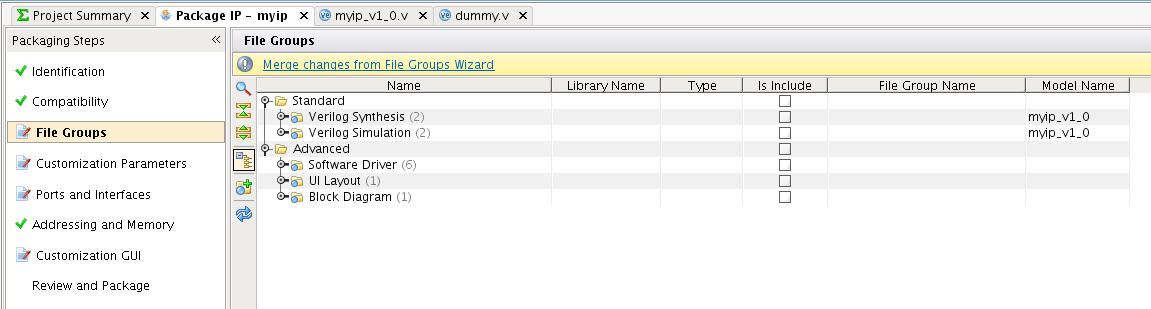 Ready to package that IP? Go to the Package IP tab in the Project Manager window. Then, select File Groups in the Packaging Steps window. You should see a window like the figure on the right.
Now click on the Merge changes from File Groups Wizard link. You will then get a link saying 2 warnings. Click on that, and you will see two warnings about your dummy.v file being on a path which is not relative to your IP root directory. What has happened is that Vivado placed the new file outside the IP component. If you go ahead and package your IP, you cannot use the packaged IP because it will be missing this file. Seems like a Vivado (2014.4) bug to me.
So how should we fix this? I don’t know how to move files in Vivado, but we can create the file in a different location when we make the new file. To do that, first delete the dummy file and remove it from disk. Just select the file, then right-click and select Remove File from Project. Select the checkbox to also delete it from disk and click OK.
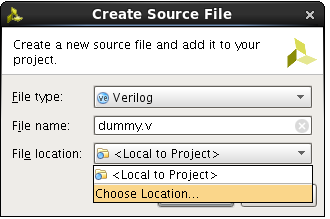 Now go to Add Sources again, and after clicking Create File…, specify the file name dummy.v, then select a new file location.
 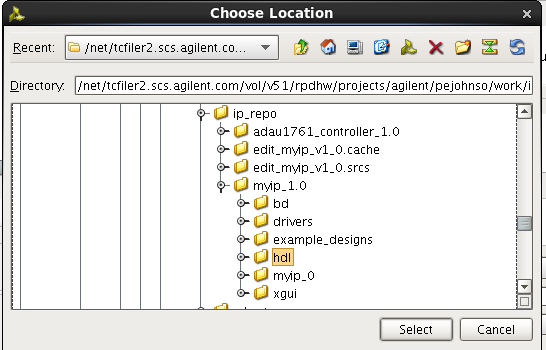 Navigate to your ip_repo area and into myip_1_0. Select the hdl directory, and click Select. Then click OK and then Finish to create the file. This will place the file in the proper location in the IP repository.
When you merge your changes in the File Groups step, you should not get any warnings. You can then package your IP and use it in your designs.
Hopefully this will be fixed in the next release of Vivado.